 This blog was originally posted on November 28, 2009, but I decided to repost it for this holiday season.
I sometimes wonder ever year when I tell people about how the people of the nineteenth century celebrated Christmas if they knew that some of their decorations were based in Pagan tradition. For example, any household of that time that could get it would put evergreen garland over their doorways and along their staircase banisters. Evergreens were a symbol of the renewal of life and were thought to bring good luck into the house, and hanging over the doorways was thought to ward off evil spirits in Pagan tradition. Holly was also used in the nineteenth century household for holiday decoration. All greenery would be adorned with berries, ribbon, wax, dough or metal ornaments and dried flowers. Pine cones were also scattered throughout the house.
The vast majority of Victorians could not afford to buy Christmas decorations and there wasn’t that much of a commercialized industry for it like there is today so most families made all of their decorations on their own. In this economic collapse we’re enduring now, I think it would be a better idea for people to take the time to make their own decorations rather than running out to Walmart to buy strings of fake berry garland or mass produced ornaments. The Victorians were about family and the value of putting work into an end result of which they could be proud and feel accomplishment. Doing some adapted crafts that the Victorians did can be a good way to spend time together as a family as well, a concept that has gotten lost in this modern society.
 One easy, unique and money-saving decorating trick that the Victorians used was decorating pine cones and making ornaments out of them. You don’t have to buy pine cones. You can take your children out to a park to collect them for this project. I did this as a child and it made me feel good to know things I made were on display alongside the store bought things. You will need a roll of ribbon and glue (probably a hot glue gun for today) and if you want to put a modern twist, you can get glitter or red, green or gold paint. Cut a length of ribbon (I think I used about 12 inches per cone but if you like small bows, use less) and create a series of loops. This is really trial and error until you achieve the number and size of loops that you want. Use the glue to hold together the base of your bow and then glue your bow to the top of your pine cone. If you want to hang your pine cone somewhere, cut another length of ribbon, loop it and glue it into the decorative ribbon. You can also place these pine cones on fireplace mantles or dining tables without the hanging loop. If you would like your cone to glitter, get a glue stick and coat your cone in glue, and then sprinkle glitter over it.
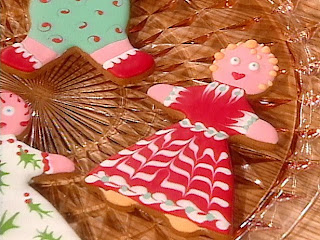
 Another Christmas craft that the Victorians did was making dough ornaments. They looked like cookies but they were not meant to be eaten. The recipe is easy as well. Mix 3 cups of flour, 3/4 cup of salt and 1-1/4 cups water. As you mix the ingredients together, take care that the dough should be very stiff. If the dough becomes sticky while you’re kneading it, add flour to it. Coat a rolling pin with a light dusting of flour and roll out the dough as you would if you were making sugar cookies. Then you use cookie cutters to cut out the shapes you want for your ornaments. Popular shapes in the nineteenth century were angels, animals and children. You will also need to cut a hole in the top of each ornament so that you can pass ribbon through it later when you want to hang it. Once everything is cut out, bake your ornaments at 250 degrees Fahrenheit for two hours. Do not start painting (most people today paint with acrylics) until the ornaments are completely cool. Lastly, poke a ribbon through the hole at the top and hang it on your tree or wherever you wish.
Another type of ornament that the Victorians liked to make were called Dresdens. These ornaments were meant to give the appearance of being metal but they were actually cardboard cutouts painted in metallic gold and silver. People don’t seem to make these very much anymore and I can’t find a picture of one but they were wildly popular in the nineteenth century. The easiest way to do it is find stencils or cookie cutters of Christmas shapes — again, the authentic way to go is angels, animals, children, fruit, etc. — and trace the shapes out onto heavy cardboard. Cut the shapes out (make sure you have a hole at the top for hanging ribbon) and use metallic paint to decorate your shapes. When I did this, I painted the whole ornament silver first, let it dry completely, and then I used gold for detail. If you have a bird, for example, the gold detail would be the eyes, feathers and accents as needed to give it a somewhat realistic look.
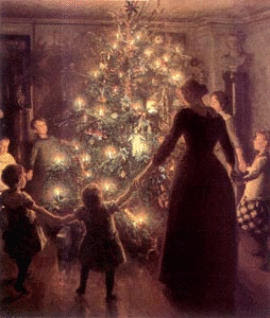
 The early Victorian Christmas trees were not the monstrous floor-to-ceiling decorated within an inch of its life trees that we have today. As I said in the last blog with historic Christmas recipes, Queen Victoria and Prince Albert brought the obscure German tradition into all the rage in the 1840s. By the 1850s, most Americans adopted the tradition as well. An authentic Christmas tree of the 1850s and 1860s would have been small. There would have been a big round table in a visible place in the home and the tree would have been on the table. Instead of Christmas lights (no electricity), they lit their tree with candles on safe branches as to not start any accidental fires. Evergreen garlands were draped around the branches along with strings of popcorn and dried berries. The ornaments were a huge mix ranging from dolls to Dresdens to dough ornaments to dried flowers to real and false fruit to wax ornaments and so on. It was very popular to have little figures of children and jolly round-faced men peeking out from behind branches.
 As the Industrial Revolution took hold after the Civil War, mass produced ornaments and decorations became more readily available. Families began abandoning the small trees on tables for the large floor-to-ceiling trees that we still use today. Glass ornaments increased in popularity as the century progressed and tinsel became more popular. Tinsel has actually been around since the 1600s from what my research shows but it was not very common on early American Christmas trees.
I hope you are able to take some of the ideas from our foremothers and forefathers to use in your holiday season this year. These activities not only save money over store bought decorations but they will give your home a very personal, unique look, and keep your children busy as well.
Read More


